Windows 7 Printer Setup Guide
This will guide you through the process of setting up a thermal printer on Windows (either Windows 7 or Vista) for Pass The Parcel.
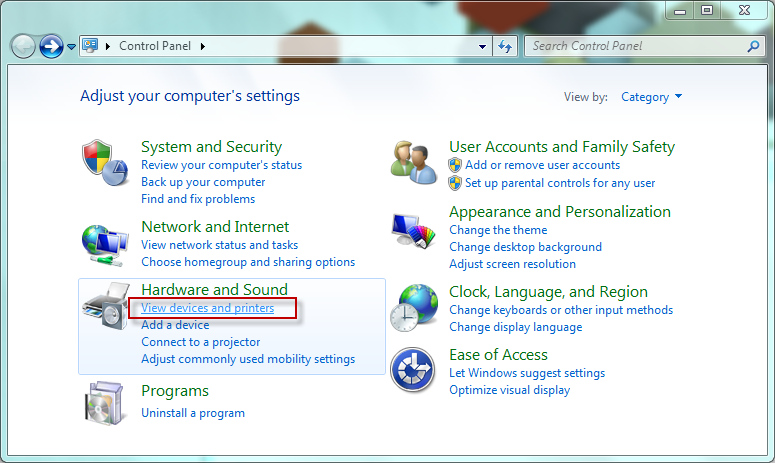
Step 1
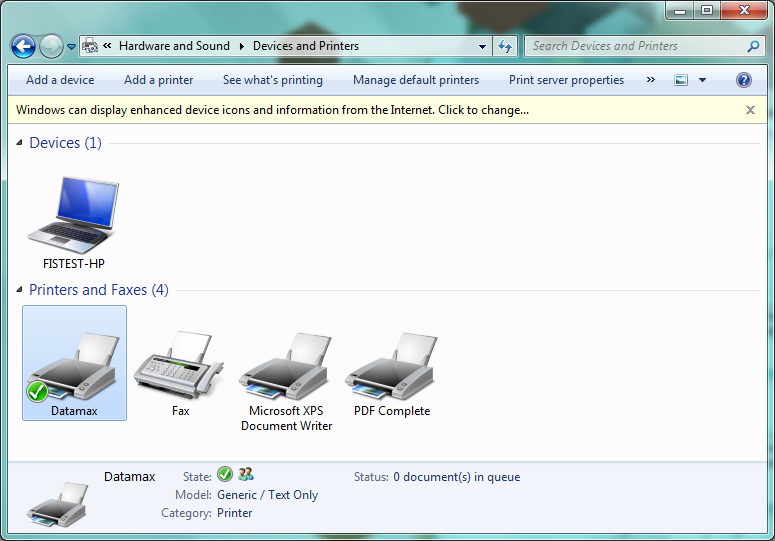
From the start menu, select Control Panel, Then from "Hardware and Sound" select "View Devices and printers"
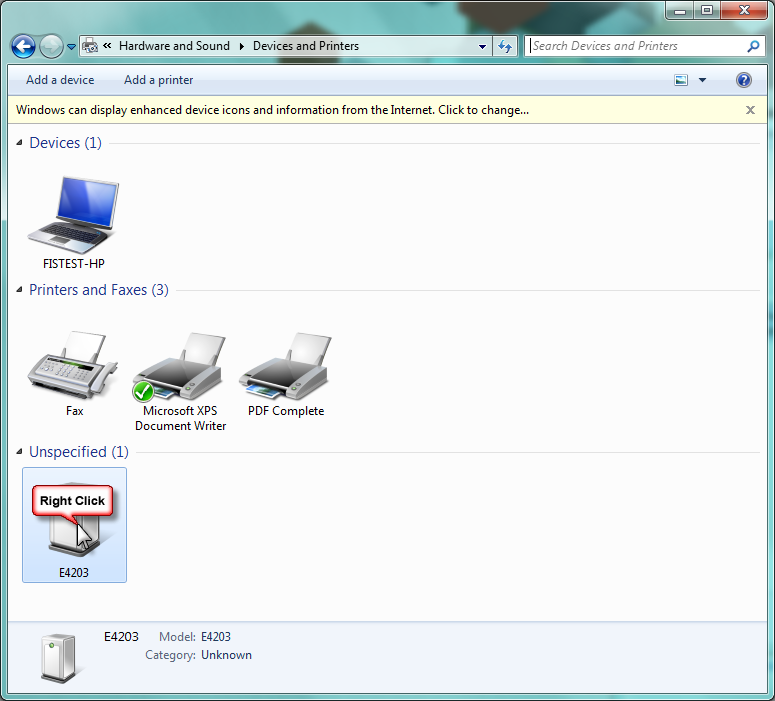
Step 2
Your thermal printer should be an unrecognised device, right click it to access the contextual menu
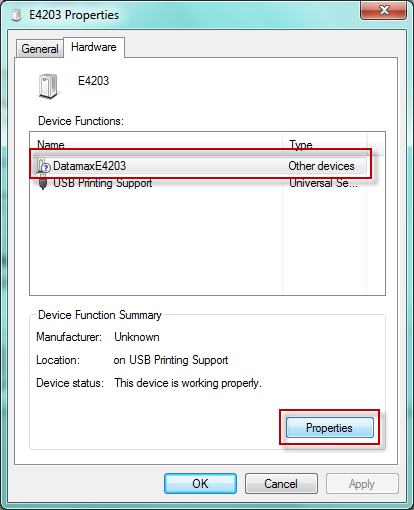
Step 3
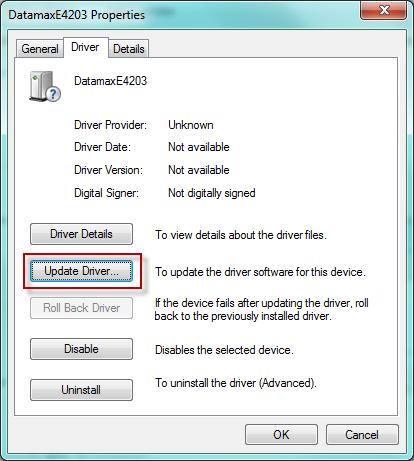
Click the properties button
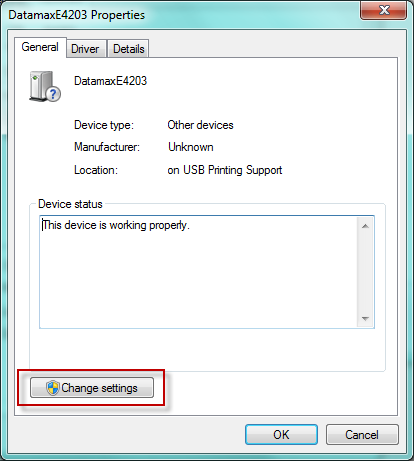
Step 4
Click the Change settings button
Step 5
Click the update driver button
Step 6
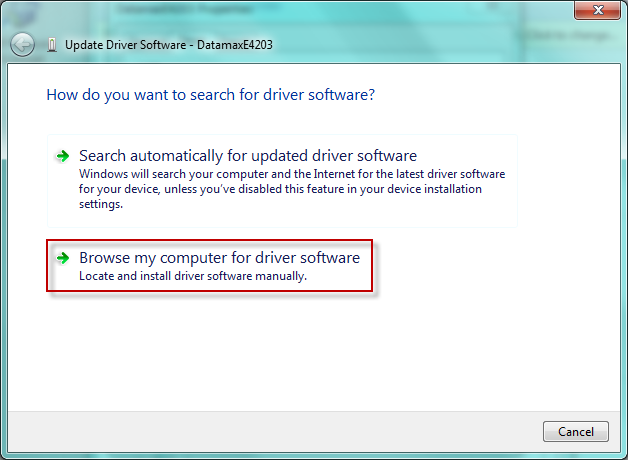
Select "Browse my computer for driver software"
Step 7
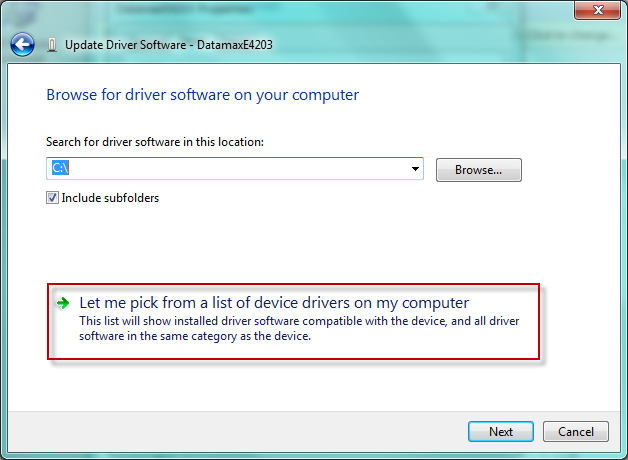
Select "Let me pick from a list of devices on my computer"
Step 8
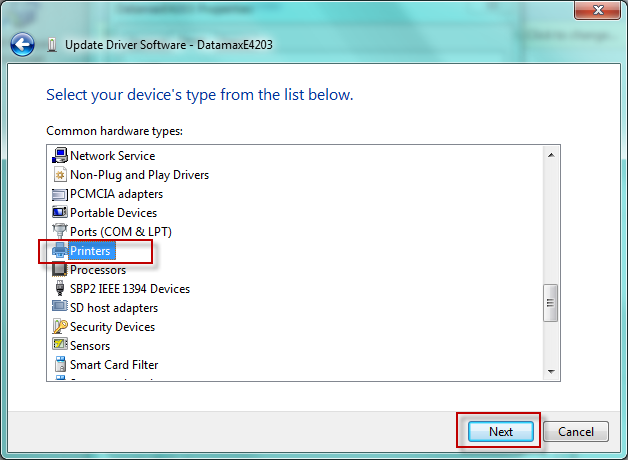
Scroll down the list of devices to the printers option, click next
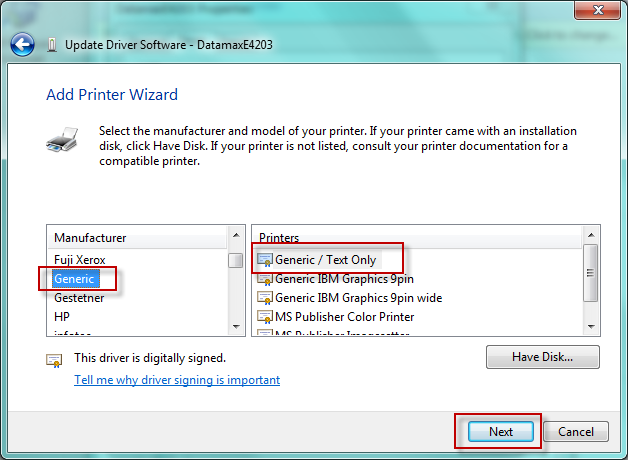
Step 9
Select "Generic" as the manufacturer, then Generic / Text only as the Printer. Click Next
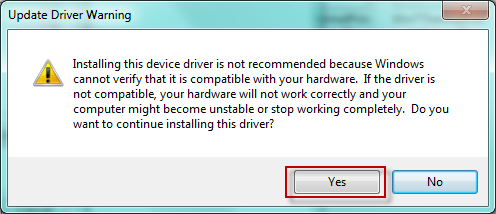
Step 10
Dismiss the warning by clicking Yes
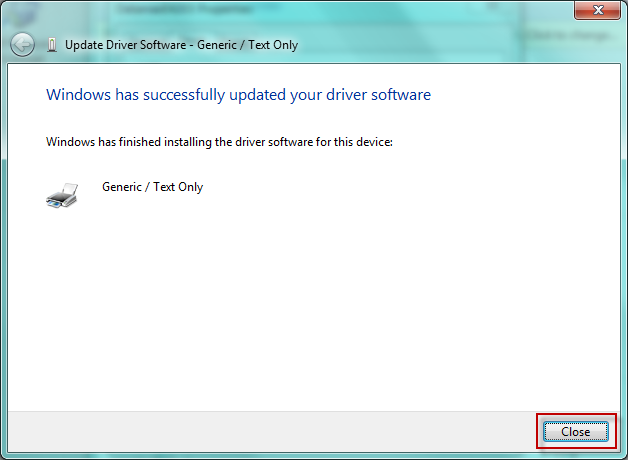
Step 11
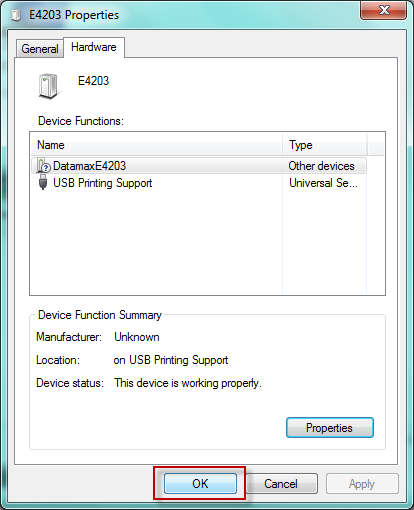
Driver selection up is complete, click close
Step 12
Close the Properties window
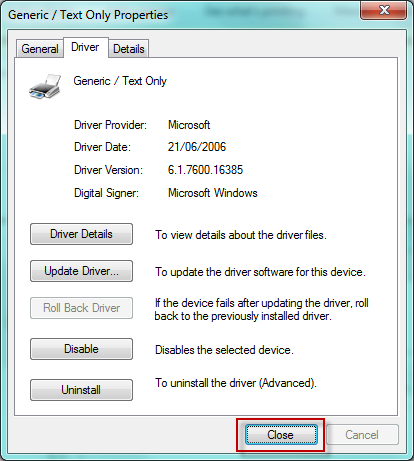
Step 13
Close the properties window
Step 14
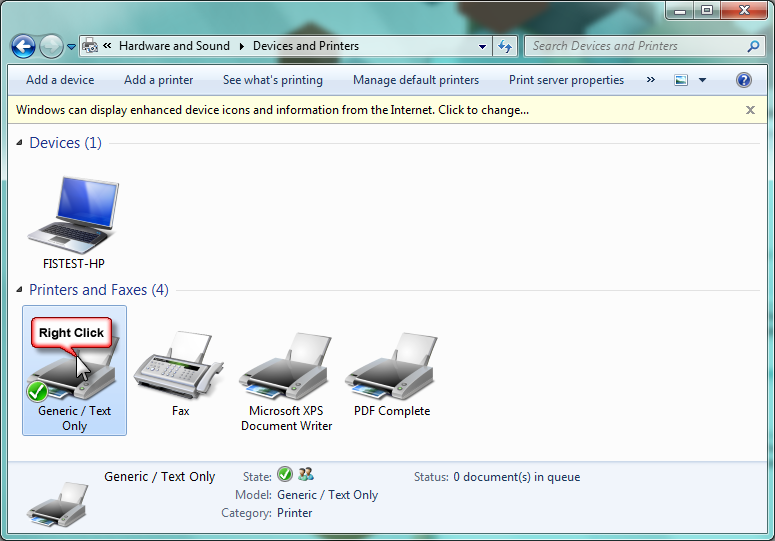
Your printer is now set up to be used, however we should rename te printer. Right click the printer to access the contextual menu
Step 15
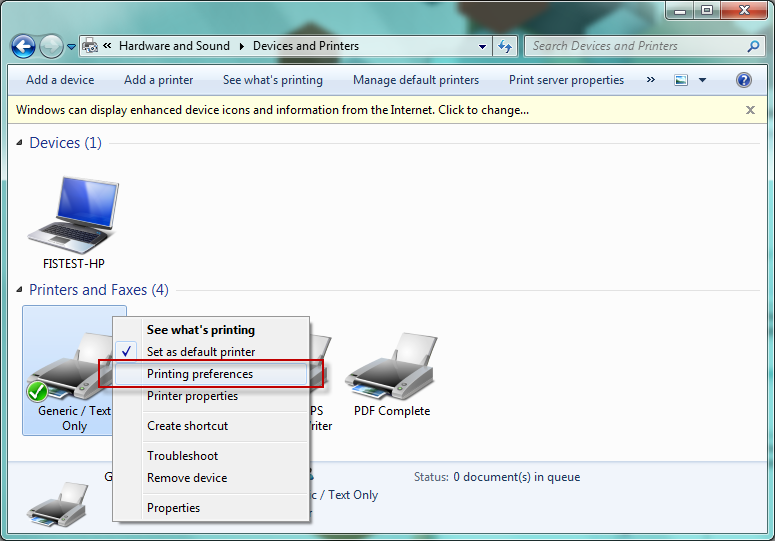
Select Printing Preferences
Step 16
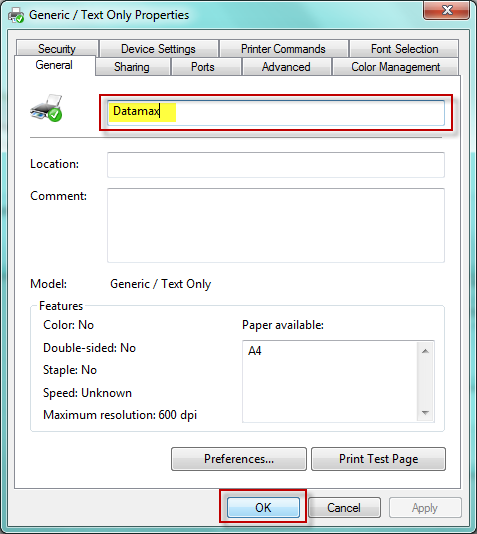
Rename the printer as you please, then click OK
Step 17
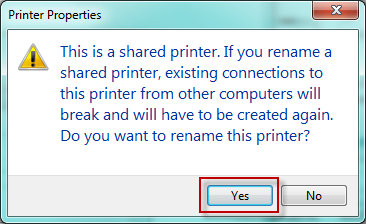
Dismiss the warning and click Yes
Step 18
Your printer is now read to use
Step 19
You can now set up your printer on the thermal printer setup page and print a test label.